23 February 2023

APEX Interactive Grid: Cell Selection as Default

When you want to copy a specific value from an Interactive Grid, you would need to change Row Selection to Cell Selection in the Actions menu.
When you don't want to expose the Actions-menu, or just to make it more convenient for your users, having Cell Selection as the Default might be more convenient.
To change this the Default, and set Cell Selection as the Default, add the following code to the Javascript Initialization Code section:

function(config) {
    config.defaultGridViewOptions = {
        selectCells: true
    }

    return config;
}

01 February 2023

Parse CSV-file in different Character Set with APEX_DATA_PARSER

When there are special characters in a CSV-file, and the file is in a different characterset than which you expect, parsing it can give unexpected results.
From different suppliers we get CSV-file, which need to be parsed and stored in the database. This is done by using APEX_DATA_PARSER.
APEX_DATA_PARSER is very flexible and allows several file-formats: JSON, XML, CSV and even native Excel XLSX.
The files are uploaded to the database (in the background) and processed. And this works like a charm,... until... one of the suppliers provided a CSV-file in a different character set, with special characters.

Below is an example of this file:

This file is uploaded to a database table with the following structure:

  Name         Null? Type          
------------ ----- ------------- 
MIME_TYPE          VARCHAR2(255) 
FILENAME           VARCHAR2(400) 
BLOB_CONTENT       BLOB  
  
The following query is used to parse the file and extract the data:
SQL> select p.col001
  2        ,p.col002
  3        ,p.col003
  4    from a
  5   cross
  6    apply apex_data_parser.parse (p_content => a.blob_content
  7                                 ,p_file_name => a.filename
  8                                 ) p
  9* /

COL001                     COL002     COL003     
__________________________ __________ __________ 
R�sselsheim am Main        3.000      624.760    
Gnutz                      1.000      139.490    
�ach-Palenberg             1.000      139.490    
Syke                       1.000      242.600    
H�kirchen-Siegertsbrunn    1.000      136.980    
Eberhardzell               1.000      233.810    
heinsberg                  1.000      67.840     
Hohndorf                   3.000      304.800    
Nidderau                   3.000      385.890    
N�n-Hardenberg             1.000      239.680    
Kl��1.000                  185.000               
K                          2.000      237.880    
W�rselen                   1.000      196.500    
Gl�ckstadt                 1.000      136.980    
Dessau-Ro�au               1.000      5.900      

15 rows selected. 
As you can see in the results above, the special characters have been removed. When a word in the first column ends in a special character, the parsing of the rest of the line is also messed up, there is a NULL in Column 3 while there should be a value.
Of course this has everything to do with the characterset of the uploaded file.

With the following command in a Terminal-window on Mac, it is possible to get information about the file, including the characterset:

  file -I name of the file
  
In my case that would yield the following results:
file -I charset.csv
charset.csv: text/plain; charset=iso-8859-1
  
This means that the file is in the characterset: ISO-8859-1

To find out which characterset this maps to in the database, the following query can help:

  SQL> select value
  2    from v$nls_valid_values
  3   where parameter  ='CHARACTERSET'
  4     and value like '%8859%'
  5* /

VALUE             
_________________ 
WE8ISO8859P1      
EE8ISO8859P2      
SE8ISO8859P3      
NEE8ISO8859P4     
CL8ISO8859P5      
AR8ISO8859P6      
EL8ISO8859P7      
IW8ISO8859P8      
WE8ISO8859P9      
NE8ISO8859P10     
WE8ISO8859P15     
BLT8ISO8859P13    
CEL8ISO8859P14    
AZ8ISO8859P9E     

14 rows selected.
  
From this list WE8ISO8859P1 is selected and passed in into the APEX_DATA_PARSER function:

SQL> select p.col001
  2        ,p.col002
  3        ,p.col003
  4    from all_csvs a
  5   cross
  6    apply apex_data_parser.parse (p_content => a.blob_content
  7                                 ,p_file_name => a.filename
  8                                 ,p_file_charset => 'WE8ISO8859P1'
  9                                 ) p
 10* /

COL001                        COL002    COL003     
_____________________________ _________ __________ 
Rüsselsheim am Main           3.000     624.760    
Gnutz                         1.000     139.490    
Übach-Palenberg               1.000     139.490    
Syke                          1.000     242.600    
Höhenkirchen-Siegertsbrunn    1.000     136.980    
Eberhardzell                  1.000     233.810    
heinsberg                     1.000     67.840     
Hohndorf                      3.000     304.800    
Nidderau                      3.000     385.890    
Nörten-Hardenberg             1.000     239.680    
Klüß                          1.000     185.000    
Köln                          2.000     237.880    
Würselen                      1.000     196.500    
Glückstadt                    1.000     136.980    
Dessau-Roßlau                 1.000     5.900      

15 rows selected.

And now all is well.

21 December 2022

APEX Calendar showing incorrect Week Number

The users of our application wanted to have the week number shown as well in the Calendar.
This can be easily done with a little bit of JavaScript. In the "Advanced" section of the Region Attributes, the is room to add "JavaScript Initialization Code".
The "Help" for this region even shows how to add week numbers in the Calendar:

Copy-and-Paste the JavaScript from the Help to the JavaScript Initialization Code and you're done:
function ( pOptions) {
    pOptions.weekNumbers      = true;
    pOptions.weekNumberTitle  = "CW ";
    return pOptions;
}
However, in our case, it didn't show the correct week number. Week number 41 and December 12 don't line up:

Add the following code to the JavaScript Initialization Code in the Advanced section of the Attributes for your Calendar region, and the week number is shown correctly:

function ( pOptions) {
    pOptions.weekNumbers      = true;
    pOptions.weekNumberTitle  = "CW ";
    pOptions.weekNumberCalculation = "ISO";
    return pOptions;
}

11 October 2022

Intervals go ISO-8601 #JoelKallmanDay

Another year, and it's time to write an entry for the #JoelKallmanDay.

My recent discovery in Oracle Database 21c, the innovation release, is how intervals can also be in ISO-8601 format.
The ISO-8601 format is an international standard for describing Date and Time formats in data exchanges.
There are two flavors of interval in the Oracle Database, "Day to Second" and "Year to Month" and there are specialized functions to convert strings in a certain format to an interval. The following example creates a "Day to Second" interval of 4 days, 3 hours, 25 minutes and 42 seconds:

SQL> select to_dsinterval ('4 3:25:42')
  2    from dual
  3* /

TO_DSINTERVAL('43:2
-------------------
+04 03:25:42.000000
Feeding this "Day to Second" interval into a JSON_SCALAR function will return the ISO-8601 standard for this interval:
SQL> select json_scalar (to_dsinterval ('4 3:25:42'))
  2    from dual
  3* /

JSON_SCALAR(TO_DSINTERVAL('43:25:42'))                                   
-------------------------------------------------------------------------
"P4DT3H25M42S" 
The reverse is also true, it is possible to feed an ISO-8601 interval into the TO_DSINTERVAL function and get an Oracle interval returned:
SQL> select to_dsinterval ('P7DT4H12M53S')
  2    from dual
  3* /

TO_DSINTERVAL('P7DT
-------------------
+07 04:12:53.000000
This works the same for "Year to Day" intervals.

04 April 2022

Interactive Grid: Filter on Column that shows an Icon

For one of our Interactive Grid we wanted to show the status of a column as an icon and still be able to filter on that column. Out of the box this is not possible. When choosing "HTML Expression" it is possible to show an icon in the column values but filtering is no longer possible.
When choosing "Text" as the column it is possible to filter on the column, but you can't specify an HTML Expression to format the column values.
Let's examine this in a little more detail and also show a solution, provided by Andreas Wismann

Let's start with the query that I will use:

select p.id as pid
      ,p.assignee
      ,p.name
      ,p.description
      ,p.start_date
      ,p.end_date
      ,case p.is_complete_yn
       when 'Y' then 'Yes'
       when 'N' then 'No'
       end as is_complete
      ,case p.is_complete_yn
       when 'Y' then 'fa-check-circle u-success-text'
       when 'N' then 'fa-times-circle u-danger-text'
       end as is_complete_icon
  from eba_demo_proj_tasks p
The last two columns (is_complete and is_complete_icon) are the ones that matter in this example. IS_COMPLETE will provide a proper English word instead of a single letter representing the status. IS_COMPLETE_ICON will translate the single letter to the appropriate icon to be shown in the column values. This column (IS_COMPLETE_ICON) will be hidden because we will use it only to format the column values.

First the plain vanilla version, no icon yet. The screenshots below show the text of the status, as well as the filter that it will produce.

Next we will change the column from "Text" to "HTML Expression", this allows to change the column value to whatever HTML you can come up with. As I want to shown an icon, this is the HTML that I used:

 <span aria-hidden="true" class="fa &IS_COMPLETE_ICON."></span>
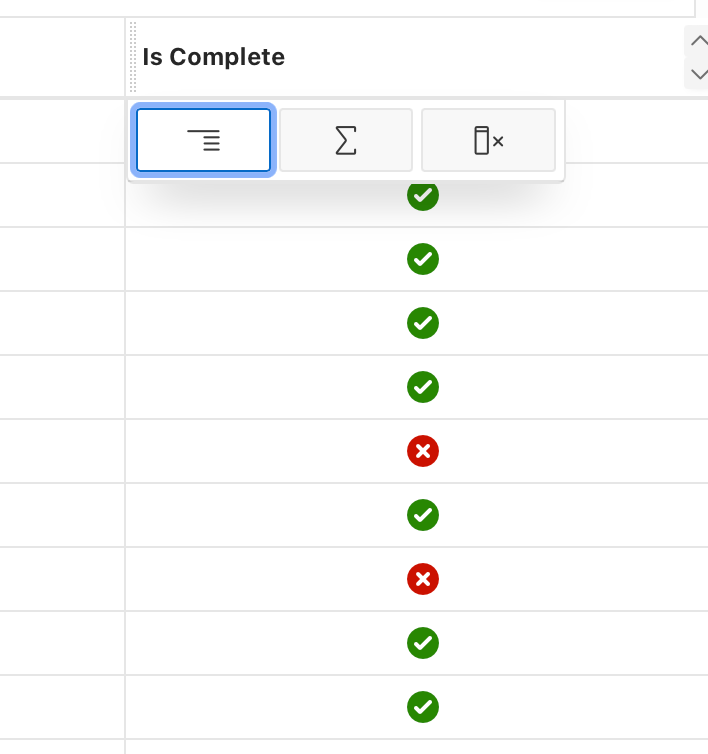
This will result in a properly formatted column, the coveted icon that we were looking for, but it is no longer possible to filter on that column. Below are screenshots of the effect that it has.

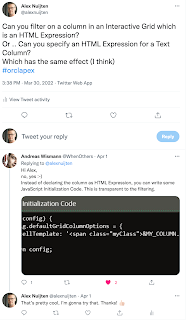
After struggling with this problem for a while, I reached out on the Twitter APEX Community and I was very happy that Andreas Wismann replied because his solution works like a charm.

As the code doesn't show properly in the screenshot from Twitter, and also for easy Copy-Paste, this is the code that you put in the JavaScript Initialization Code of the column where you want to show the icon
function( config ) {
    config.defaultGridColumnOptions = {
        cellTemplate: '<span aria-hidden="true" class="fa &IS_COMPLETE_ICON."></span>'
    };
    return config;
}
And the final result in pictures:

17 March 2022

ORA-24017: cannot enable enqueue on QUEUE, %s is an exception queue

Generating documents can take quite some time, which I prefer to do in the background. To facilitate this we use Advanced Queueing (DBMS_AQ). We place the orders that we want to have a document for in a Queue. There is a callback function on the Queue which will take care of the document generation (we use APEX Office Print).
If the above is abacadabra to you, I suggest you read up on DBMS_AQ and callback functions on this blog by Adrian Billington.

Normally this works flawlessly, until recently when there was a typo in the URL to call AOP.
When the callback function would try to call AOP, it was unable to do so. Eventually this would cause that the message in the Queue would be moved to the Exception Queue.

So now we have all these messages in the Exception Queue and still no documents. The plan was to Dequeue the messages from the Exception Queue to the Normal Queue and have them processed again, of course after the typo was corrected.
By default it is not possible to Dequeue messages from the Exception Queue. So step one would be to enable Dequeue for the Exception Queue.

First step: find out the name of the Exception Queue:

  SQL> select name
  2        ,queue_table
  3        ,queue_type
  4    from user_queues
  5* /

                       NAME              QUEUE_TABLE         QUEUE_TYPE 
___________________________ ________________________ __________________ 
AQ$_ORDER_DOCUMENTS_QUEUE_E    ORDER_DOCUMENTS_QUEUE    EXCEPTION_QUEUE    
DOCUMENTS_QUEUE                ORDER_DOCUMENTS_QUEUE    NORMAL_QUEUE       
  

Next step, enable the Dequeue on the Exception Queue:

SQL> begin
  2     dbms_aqadm.start_queue (queue_name => 'AQ$_ORDER_DOCUMENTS_QUEUE_E'
  3                            ,dequeue    => true
  4                            );
  5  end;
  6* /

Error starting at line : 1 in command -
begin
   dbms_aqadm.start_queue (queue_name => 'AQ$_ORDER_DOCUMENTS_QUEUE_E'
                          ,dequeue    => true
                          );
end;
Error report -
ORA-24017: cannot enable enqueue on QUEUE, AQ$_ORDER_DOCUMENTS_QUEUE_E is an exception queue
ORA-06512: at "SYS.DBMS_AQADM", line 747
ORA-06512: at "SYS.DBMS_AQADM_SYS", line 8626
ORA-06512: at "SYS.DBMS_AQADM_SYSCALLS", line 124
ORA-06512: at "SYS.DBMS_AQADM_SYS", line 8540
ORA-06512: at "SYS.DBMS_AQADM", line 742
ORA-06512: at line 2
24017. 00000 -  "cannot enable enqueue on QUEUE, %s is an exception queue"
*Cause:    User tried to enable enqueueing to an exception queue.
*Action:   None.

However this doesn't work, as you can see above.
As I didn't read the error message properly, I thought it said that Dequeue was not allowed on an Exception Queue, but it was complaining about the Enqueue.
The default value for the Enqueue argument in DBMS_ADADM.START_QUEUE is true, and this is not allowed.

SQL> begin
  2     dbms_aqadm.start_queue (queue_name => 'AQ$_ORDER_DOCUMENTS_QUEUE_E'
  3                            ,enqueue    => false
  4                            ,dequeue    => true
  5                            );
  6  end;
  7* /

PL/SQL procedure successfully completed.

Including the Enqueue argument in the call to DBMS_AQADM.START_QUEUE remedies this.

Now it is trivial to Dequeue from the Exception Queue and Enqueue on the Normal Queue:

declare
   l_dequeue_options    dbms_aq.dequeue_options_t;
   l_message_properties dbms_aq.message_properties_t;
   l_message_handle     raw(16);
   l_payload            document_queue_ot;
   
   l_enqueue_options    dbms_aq.enqueue_options_t;
begin
   for r in (select q.msgid
               from order_documents_queue q
              where q_name = 'AQ$_ORDER_DOCUMENTS_QUEUE_E')
   loop
      l_dequeue_options.msgid := r.msgid;
      dbms_aq.dequeue (queue_name         => 'AQ$_ORDER_DOCUMENTS_QUEUE_E'
                      ,dequeue_options    => l_dequeue_options
                      ,message_properties => l_message_properties
                      ,payload            => l_payload
                      ,msgid              => l_message_handle
                      );
      dbms_aq.enqueue (queue_name         => 'documents_queue'
                      ,enqueue_options    => l_enqueue_options
                      ,message_properties => l_message_properties
                      ,payload            => l_payload
                      ,msgid              => l_message_handle
                      );
   end loop;
end;

After the processing of the Normal Queue, there were still a few messages that popped back into the Exception Queue. After careful examination, it was determined that they could be purged from the Exception Queue:

declare
   po_t dbms_aqadm.aq$_purge_options_t;
begin
   dbms_aqadm.purge_queue_table ('ORDER_DOCUMENTS_QUEUE'
                                ,'qtview.queue = ''AQ$_ORDER_DOCUMENTS_QUEUE_E'''
                                , po_t
                                );
end;
/

Links

02 March 2022

Modify a JSON structure with a single Update

Recently there was a question on the Oracle Community Forum related to JSON, more specifically how to change the structure of it. The link to the Question is at the bottom of this post.
The starting point is the following JSON:

  {
   "tktKey": "123456",
   "attlist1": [
      {
         "attkey": "123",
         "attval": "abc"
      },
      {
         "attkey": "456",
         "attval": "def"
      }
   ],
   "attlist2": [
      {
         "attkey": "098",
         "attval": "xyz"
      }
   ]
}
  
The task at hand was to combine both attlist1 and attlist2 into a single attlist.
To do this the JSON object that is contained in attlist2 need to be extracted and place in attlist1. After that the element attlist2 can be removed from the structure. When this is done, there is an element with attlist1 with three JSON objects in it. Finally the element attlist1 needs to be renamed to attlist.
All of these actions can be done with a single SQL statement using JSON_TRANSFORM.

Let's first create a table to hold the original JSON
   SQL> create table js
  2  (str clob 
  3  )
  4* /

Table JS created.
   
And insert the JSON Object in there.
   SQL> insert into js values ('{ "tktKey": "123456", "attlist1": [ { "attkey": "123",   "attval": "abc"  },  { "attkey": "456","attval": "def"  } ],  "attlist2": [{"attkey": "098", "attval": "xyz"  } ]}')
  2* /

1 row inserted.
   
Here comes the magic moment:
   SQL> update js
  2     set str= json_transform
  3                (js.str
  4                ,append '$.attlist1'
  5                    = json_query (js.str, '$.attlist2[*]')
  6                ,remove '$.attlist2'
  7                ,rename '$.attlist1' ='attlist')
  8* /

1 row updated.
   
With JSON_QUERY (line 5) I extract the JSON Object from attlist2, which is added (APPEND, line 4) to attlist1.
Attlist2 is removed from the JSON object (line 6) and finally on line 7 attlist1 is renamed to attlist.

And to view the results, in a nice readable format:
SQL> select json_query (j.str, '$' returning clob pretty) as result
  2    from js j
  3* /

RESULT 
_______ 
{
  "tktKey" : "123456",
  "attlist" :
  [
    {
      "attkey" : "123",
      "attval" : "abc"
    },
    {
      "attkey" : "456",
      "attval" : "def"
    },
    {
      "attkey" : "098",
      "attval" : "xyz"
    }
  ]
}    

The more I use the JSON functionality that the Oracle database has to offer, the more I like them!


Links